You know how smartphones have all these Pro-level features on their camera apps, but you just don’t use them because you don’t know HOW to use them and WHEN to use them?
Well, this is the new Global variant of the Xiaomi 14 Ultra, and after reading this, you are guaranteed to use all the Pro-level features that the camera has, specifically for video because I will teach you how and when to use them.

And here’s a bonus: I’ll also let you know what exactly you get in the Xiaomi 14 Ultra Photography Kit and help you decide whether or not you need it.
Photography Kit Unboxing
Let’s start with what comes inside of the Xiaomi 14 Ultra Photography Kit.
So the box is pretty large, and as soon as you open the box cover, there is the visual of the photography kit outline over there.

Taking that off immediately reveals the entire kit nicely arranged, and here’s where there is:
- the Xiaomi 14 Ultra’s photography kit protective case,
- a 67mm Thread Filter Adapter,
- the Decorative Ring,
- the Camera Grip,
- and a small white-colored box, where in there, you’ll find a little paper pouch which has the wrist strap.
- Then there are the user manuals over there too.

Photography Kit Usage
Next, let’s go through how to use this entire kit.
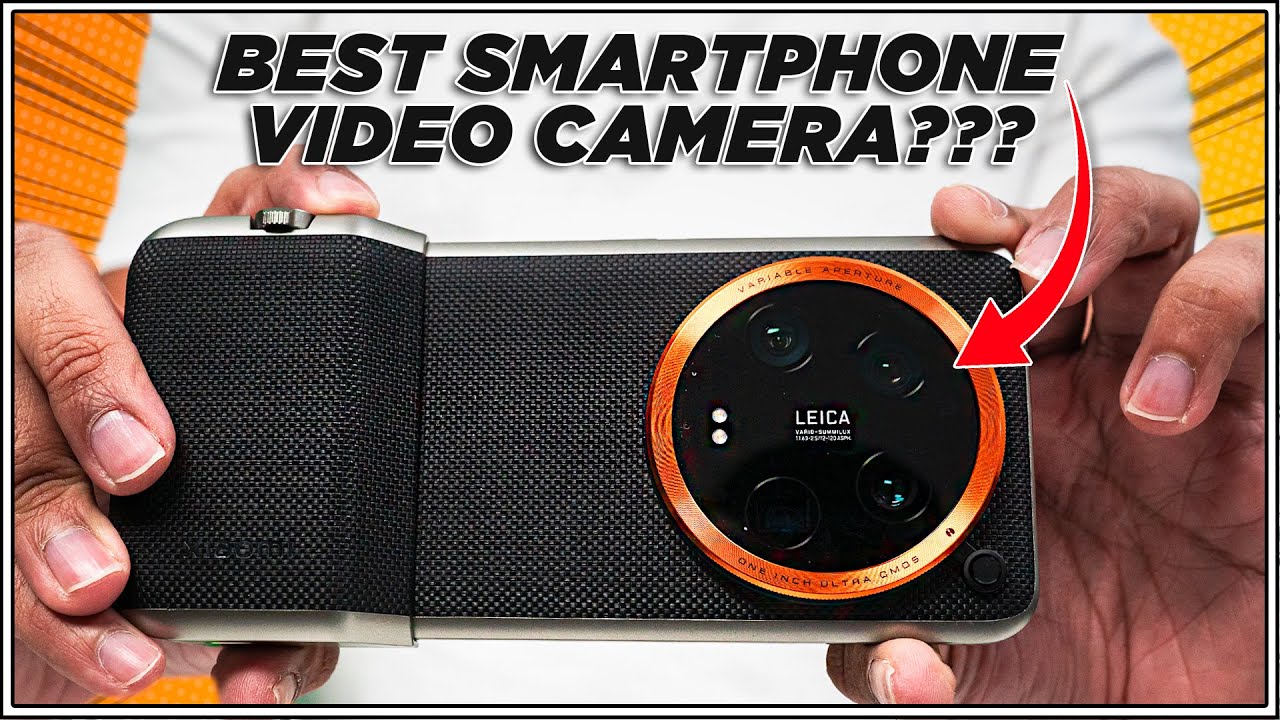
Start by putting the photography kit protective case first, then slide the camera grip with the USB port aligned to the phone. And what’s cool is that this camera grip also has a built-in 1500 mAh of battery so it will immediately charge the phone.

Now, going over to the overall usage of this camera grip, well, other than giving you a nice camera grip, it also gives you physical controls for camera settings very similar to how a digital camera is.
First, the biggest button over there is the shutter button and by pressing it, it gives you a manual focus and you can turn the lever over there for zooming, and of course, this allows you to change the different levels of zoom very seamlessly.

Then next to it is the custom dial where by default it adjusts the exposure very easily over here. Then there is a dedicated record button over there.

Then at the back is where you can either put the 67mm thread filter adapter to put any additional filters probably like an ND filter, but since I do not have one, I decided to put this nice decorative ring since it gives a nice premium look to the phone.

Then as for the wrist strap, that is also something that I don’t use but if that is something that you like to put on, you can also easily attach that.
So to answer when or who will exactly use this, well, personally, I really love this because it does enhance my video recording experience since I was using this phone daily as it does transform the phone into a pocket-size digital camera.

So if you love your experience to be more physical when you record videos to get a quick adjustment manually or you just like the feature of the phone looking like a real camera, then yes, this photography kit is for you.
Camera Specs
Next, here’s a recap of the specs. So the main camera is a 50MP with a huge Sony LYT-900 1-inch sensor and a dual native ISO Fusion Max, so it has a dynamic range of 14 stops and that is even more than my Blackmagic 6K cameras which has only 13 stops.

Then the other three cameras are 50MP too with:
- a 75mm Leica Floating Telephoto lens of 3.2x optical zoom,
- a 120mm Leica Periscope lens with up to 5x optical zoom,
- and a Leica 12mm or a 0.6x Ultra-wide lens
and these three lenses are the IMX 858 sensor.
Camera App Walkthrough
First, let’s go through the camera app and let you know the basics first.
Under the video options, which I’m very sure that you’re used to, typically at the bottom there are different focal lengths available between 0.5x to 5x optical zoom which you can go up to 15x digital zoom specifically for this video mode.

Then just next to the camera lens option, there’s a feature that shows EV which stands for Exposure Value. And this for the phone’s case is where you can control the aperture value over here.

So why would you use this feature? Well, you know how when you try to take a video of a room or an area of light and dark and then you see this weird brightness shift where it suddenly goes bright and then you need to touch the screen to hopefully adjust the right brightness, yes, now you can control it manually so it will stay the same all the way until you manually adjust it.
So imagine a scenario when you move from indoors to outdoors, by default when you shoot towards the sky, the automatic EV settings on the regular smartphone will usually try to underexpose or overexpose the skies, depending on the phone’s “mood”.

Well, now on this phone, you can do it yourself because sometimes you maybe want to show the skies a little more, or sometimes you want to expose the subject a bit more, so this manual adjustments mean that YOU are the boss!
And if you click the Star icon next to it, here’s where you’ll be able to choose the different Pro LUTs available. LUTs meaning “Look Up Table”, which are color presets, which you can choose between Scarlet, Vermilion, Teal Mist, which is my personal favorite to give that orange and teal movie look. And then there is Ink for the black and white look and other filters like Glee, Green Tea, and Hazelnut.

Then under the Filters tab, here’s where you’ll find similar style filters but more catered towards the ones from Leica like the Leica VIV or Vibrant, Leica Natural, Black and White Leica Natural, and many others to choose from to suit what you like best.

Then there is the Beautify tab where in case you did not know, it puts a beauty effect on the person that you’re shooting.

There’s the toggle to turn on the flash. Right in the middle there is an arrow, and here’s where you can see a drop-down menu for options like flash and resolution where you can select up to 8K 30 FPS, yes, 30 FPS, the right frame rate, but keep in mind that you can only record in 8K if you turn HDR off.

Then next, there is the frame rate where at 4K it can shoot up to 120 FPS, and that is something that only usually high-end mirrorless cameras can do and some cinema cameras like Blackmagic 6K cameras can’t even shoot that high of a frame rate.

Then there’s the Steady Video toggle to stabilize the shots.

Then there’s the Aperture adjustments, either from Auto or selecting between F1.63, F2.0, F2.8, and F4.0.

Next to that, you can toggle the Gridlines, change the aspect ratio to either 9:16 or widescreen, and toggle Super Macro for macro video recording.

So this Super Macro video recording, as the name suggests, is where if you come to a situation where if you want to take videos of a tiny subject or go closer than usual to a subject if you want to take videos then you should toggle this on.

Then there’s also the Motion Tracking Focus, and this will come in handy if you’re shooting product-style videos to get focus locked into the subject.
Then there is the Teleprompter toggle, and yes this is a feature that nobody talks about as this would be perfect if you’re into vlogging and want to remember what exactly you want to say if you put on your notes or even a whole entire script. So instead of downloading a separate app you can use it built-in in the camera app.

Then there’s the Source Tracking as well. And if you hit the Gear icon at the top right of the menu, here’s where you’ll see further settings over there, and I would honestly say that this is nothing much to look at and it is best to leave it at default.

Then here’s where you can toggle the HDR and adjust the resolution and the frame rate directly over there, and finally, you can toggle the Master Cinema feature over there too. So let’s talk about that next.

Master Cinema
Master Cinema will significantly record all color information in a 10-bit color depth with a BT 2020 HLG color profile leveraging from the Sony LYT-900 1-inch sensor with a cinematic look which is extremely suitable for video output.

And compared to NOT choosing this Master Cinema mode it gives you a standard HD profile, hence it won’t give you that flexibility after you taken the video.

So when would you use this Master Cinema? Well, it depends on the scenario where if you have a more complicated scene probably if it’s too dark or is extremely bright, you can dial down or dial up the overall shadows and exposure accordingly AFTER you take a video, instead of being stuck on whatever that you’ve recorded.

And trust me, once you see this amazing flexibility that this Master Cinema mode can give, you’ll barely even use the regular video recording mode, and also just so you know that you can also use this Master Cinema mode in the Movie tab in the camera app as well.
And in this Movie mode, if you want to take videos that give you a very cinematic movie style of an aspect ratio, this will be your favorite mode as it gives you an aspect ratio of 2.39:1 aspect ratio, where it gives you that really nice beyond widescreen mode.

Pro Mode
Next let’s look at the Pro mode. Now, before you freak out and leave… Don’t leave, come back! This Pro mode is not as scary as you think, so let me hold your hand and go through it together, okay?
So this Pro mode can be found just next to the Movie Mode, and by default, it will be under the photo adjustments, but just click the Video Camera icon at the bottom right to switch it to video.

And the interface of this app is somewhat similar to the previous two modes shown but instead there are additional Pro-level settings.

This reminds me of the Blackmagic camera app, which unfortunately is only available for iOS devices. So it is nice that the Xiaomi 14 Ultra has that built-in and it also captures in LOG format to give you even more flexibility in post-production.
So firstly there are the adjustments for ISO, which is the control of light as mentioned earlier, the variable aperture adjustments between F1.63 to F4.0, and you can even do step-less adjustments between these two apertures seamlessly, and this of course affects the overall light and also the shallow depth of field or the subject to background blur in simple terms.


Then there’s also an adjustment for Shutter Speed, which not only affects light but also motion blur. So the higher the shutter speed, the darker that the video will be, but if you’re moving left to right, it will give you less of a movement of blur and that is what motion blur means.

Then AF is for Auto Focus where you can leave it to Auto or if you prefer manual adjustments, you can do that too. Finally there are the White Balance adjustments over there where you can leave it at Auto or just adjust it to make your footage more warm or cooler white.

Then the Microphone icon next to it shows the different audio sources that you would like to use when you’re recording the video, where there is the audio meter at the top left for you to monitor the audio accordingly.

Then at the bottom, the “i” icon is to give you a description of all the features over there.
![]()
Director Mode
Then one final Pro mode that you must be introduced is the Director Mode and by default you’ll find it under the More Tab.

This is a revamped Director Mode with a fully customizable workflow, it has the similar adjustments mentioned in the Pro mode, but it has one very unique feature that no other smartphone has, which is the ability to use other Xiaomi phones and even Xiaomi Pad tablets as your monitor. Yeah, seriously!

So this will give an even more immersive video monitoring experience say if you’re a director or you want someone to help you shoot, you can monitor the shots accordingly.
To use this feature, there’ll be a camera icon at the bottom left, then you can choose whether or not you want the phone to be the camera or a monitor, and make sure that both devices have the same Wi-Fi network, and you’re all set.

Then the other additional monitoring options in this mode are the Battery Indicator, the total amount of recording time, and histogram and waveforms for exposure too.

Conclusion
So there you have it my friends, an in-depth walkthrough, video footage and all the features and everything that you need to know on a video perspective on the brand-new Xiaomi 14 Ultra.

And with this, it really shows how this Xiaomi 14 Ultra has become the pinnacle of all video features all packed in a smartphone that you can carry anywhere anytime with you.
Now, if you want to see an in-depth photography review of the Xiaomi 14 instead, check out that video over here: https://youtu.be/UUpJzb0gKUc